
my birthday card is finally done! as usual, here are the steps to making a chinese birthday card!
 STEP 1:
 STEP 2:
 STEP 3:
 STEP 4:
 STEP 5:
 STEP 6:
 STEP 7:
 STEP 9:

 STEP 10:
 STEP 11:
 STEP 12:

 STEP 13:
 STEP 14:
 STEP 15:
.jpg)
.jpg)
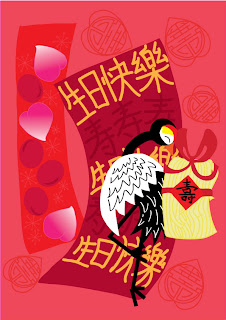
AND THERE YOU HAVE IT! MY CHINESE BIRTHDAY CARD DESIGN!
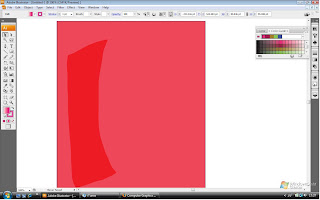
STEP 1: i drew the a rectangle as the background and had filled with a coral colour. then i drew another red rectangle. i used the pencil tool (P) for both rectangles
 STEP 2:
i then drew a peach. i used the pencil tool (P) again for the outline and filled it in with a gradient fill of bright pink.
 STEP 3:
next i used the elipse tool (L) to make the basic shape of an egg. i adjusted the anchors around it so it looks more oval, like an egg. i filled it with a dark megenta too.
 STEP 4:
by using the Lasso tool (Q), i selected the peach and copied it. then i pasted the copy and positioned it around the red rectangle. some of the peaches are rotated using the Rotate tool (R). the same goes for the red eggs as well. then i drew another rectangle and filled it dark magenta. by using the Paintbrush tool (B), i wrote the words '生日快乐' on it.
 STEP 5:
next i wrote '寿' using the same tool but with a different colour.
 STEP 6:
i continued writing '生日快乐' and '寿' using the Paintbrush tool (B). i did not copy and pasted the words because the rectangle background is irregular, so each of the characters needs to be written individually to be fitted in nicely.
 STEP 7:
next comes the crane. i drew the head and body using the Ellipse tool (L), the wings and feathers using the Paintbrush tool (B), and the Line segment tool (/) for the legs and the facial features and beak of the crane using the Pencil tool (P).
 STEP 8:
 STEP 8:
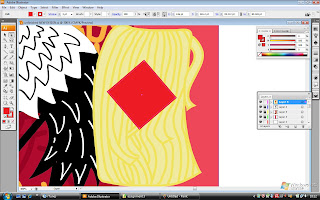
next to the crane, i drew another rectangle, this time it is light yellow. i drew on wavy lines to make it look like noodles. then i added a red diamond on it.
 STEP 9:
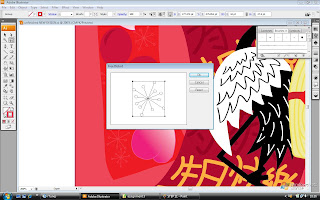
then i used the Pencil tool to draw a ribbon next to it. and i used the Paintbursh tool (B) in 15 pt. oval to write '寿' , but in the Traditional chinese variation.

 STEP 10:
after that, i used the Line segment tool (/) and Ellipse tool (L) to draw a pattern of a cherry blossom.
 STEP 11:
just like in STEP 4, i copy and pasted the cherry blosom design and positioned them around the rectangle. i used the Free distort effect to change the size of some of the cherry blossoms.
 STEP 12:
i used the Ellipse tool (L) and and Pen tool (P) for another '寿' pattern for the background of the birthday card. i also used 'Reflect' for some lines in the design, since it is laterally inverted.
 STEP 13:
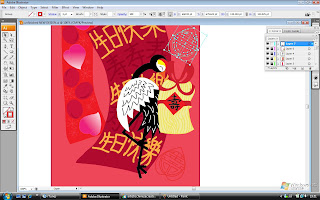
 then i copy and pasted the design again and positioned it around the background. i used 'Scale' to change the size of the designs around the background.
 STEP 14:
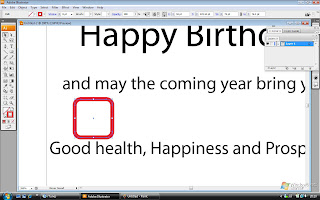
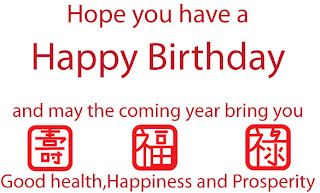
 now we move on to the greetings part of the birthday card. i typed the greetings using the Type tool (T)
STEP 15:then i used the Rounded rectangle tool to draw a rounded square on top the words 'good health', 'happiness' and ' prosperity'. i drew teh chinese characters for each of the words. '福' for happiness '禄' for prosperity and '寿' good health.
AND THERE YOU HAVE IT! MY CHINESE BIRTHDAY CARD DESIGN!
let me be the first to comment!
ReplyDeleteCANTEEEEEEK WOOOOO!!! XO
haha, thanks! you're the first to comment and the only one to comment! terharunya~~ thank you thank you!!!
ReplyDeletewahse... nice!!!
ReplyDelete